Electric Faucet/Tap Installation Guide
Please follow the installation and operation instructions carefully, to ensure the long life and reliable operation of this appliance.

Application

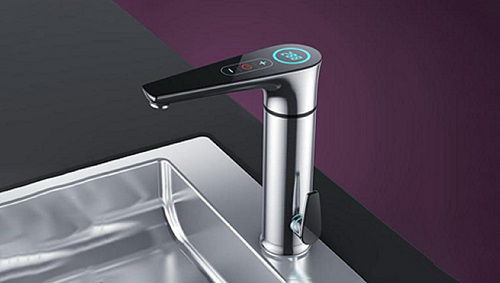
Electronic On Demand Instant hot water faucet is for household and Commercial use. It can be used for kitchen sink and basin. It is not suitable for shower.

Operation Instructions

1
  • Before operating the faucet please let the water flow into the faucet before turning ON to the power the appliance
2
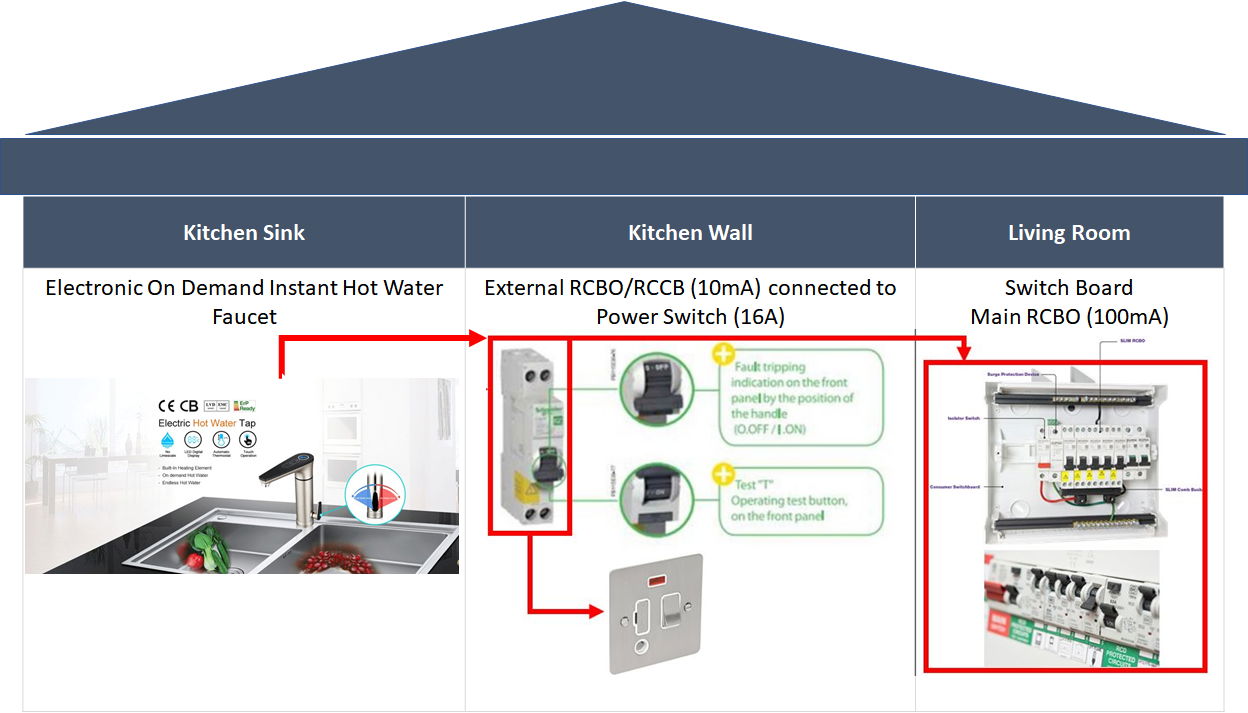
  • Turn on the circuit breaker to power the Electronic On Demand Instant hot water faucet
3
  • In standby mode, the LED display screen light is ON and displays the setting of outlet temperature
4
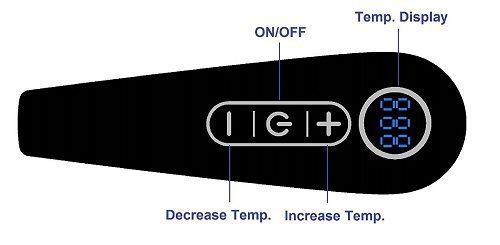
  • Touch the screen to turn ON/OFF the power of appliance. Press + and – to increase or decrease the outlet temperature
5
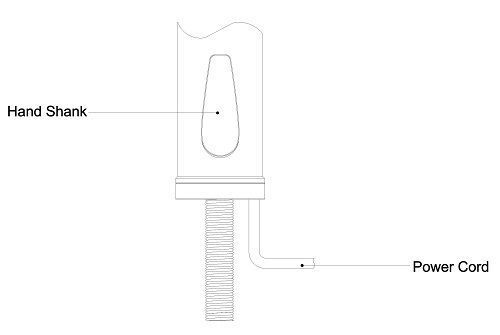
  • Turn the hand shank knob toward cold water to let cold water dispense from the faucet and similarly can use used to increase the cold water flow
6
  • Rotate the hand shank knob anti-clockwise for hot water and subsequently control the flow of dispensed hot water. 
7
  • The built in program will auto adjust the working power to reach the desired set temperature
8
  • The nozzle is rotatable 180° (degrees)

Note: High flow / High water pressure may not dispense desired hot water at set temperature. If so please reduce the water flow to achieve desired hot water


Important Safety Instructions

1
  • For your satisfaction and safety, read all instructions before installing or using the Electronic On Demand Instant Hot Water Faucet
2
  • The appliance can be connected to 
    • Source water feed for the use of regular water for cleaning or other required purpose
    • Undersink Water Filtration System
3
  • This appliance can be used by children aged from 3 years and above and people with reduced physical, sensory or mental capabilities or lack of experience and knowledge if they have been given supervision or instruction concerning use of the appliance in a safe way and understand the hazards involved. Children should be directed not play with the appliance. Cleaning and maintenance of the product shall not be made by children without supervision
4
  • Make sure that all electrical wiring, plug and connections confirm to local codes. Means for disconnection must be incorporated in the fixed wiring in accordance with the wiring rules. This appliance must be installed in accordance with the national wiring regulations
5
  • This appliance shouldn't be used without inlet water supply
6
  • Filter screen is required to be fixed at the water inlet. filter screen must be regularly cleared and the outlet nozzle must be descaled regularly if using with the source water
7
  • Rated pressure of the tap is 0 Pa, the gate of water inlet & outlet mustn’t be blocked. The out-let must not be connected to any tap or fitting other than those specified
8
  • In cold winter, if the hot water temperature is not hot enough, the hand shank can be adjusted the water flow to increase or decrease the hot water temperature
9
  • Our appliance are thoroughly tested for processed water and energy usage test before leaving factory , if there is a little water at the water inlet and water outlet while you use it for the first time, it is a normal phenomenon, please feel at ease to use it
10
  • If there is damage to the wire, you must contact qualified electrician to replace it with dedicated wire from our authorized dealers


Diagram

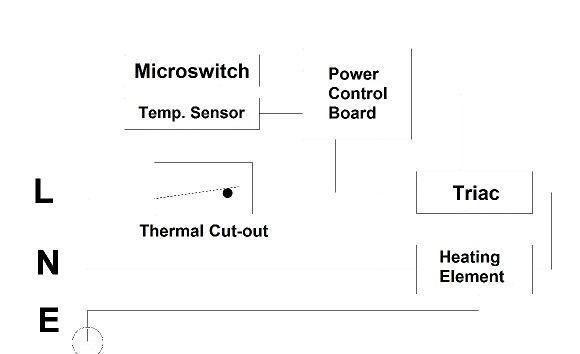
Electrical diagram 
electric-drawing-instant-hot-water-tap

Product Inner Structure
Display Screen
instant-hot-water-tap-temperature

Technical data

Voltage
220-240v
Rated frequency
50/60Hz
Power
3.3kW
Temp. Setting Range
30-50°C
Overheat Protection
55°C
Thermal Cut-out
65°C(Automatic Reset)
90°C (Manual Reset)
Rated Pressure
0MPa
Water Pressure
0.02-0.6MPa
Hot Water Flow
1L-5L
Inlet Connector
G1/2”


Installation guideline

The installation must be in compliance with the National Electrical Code, your local electrical and plumbing codes.

1
  • Make sure the appliance is intact, and the fittings are complete
2
  • Please make sure the main power supply, water pressure, grounding condition, ammeter and wire reach the standard of installation requirement
3
  • The appliance must be connected to properly grounded dedicated branch circuits of proper voltage rating
4
  • If you do not plan to use the appliance for days (due to travel or any other reason), please switch off from the circuit breaker and also the turn off connected source water 
5
  • Position the unit upright with all plumbing connections at the bottom of the unit
6
  • During the installation, water supply must be tested before the power supply


Installation Diagram:


Installation Method


1→ The appliance can fit 2 different mode of power connection,
1) power connection is above the table-board;  
2) power connection is below the table-board;  Please confirm the power connection mode first. Below are the installed assembly drawing

Fig 1-A power cord connect above the table-board


Fig 1-B  Power cord under table-board

2→Make the water inlet connection pass through the pedestal, place the power cord into the cavity of pedestal. Please refer below Fig 1-A and Fig 1-B

Fig 2-A power cord connect above the table-board


Fig 2-B  Power cord under table-board

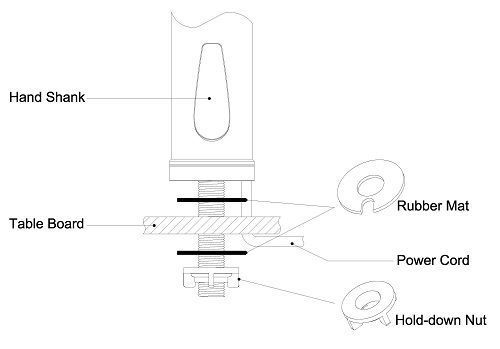
3→Make the water connection pass through the rubber mat, please notice there is a cavity at the rubber mat to fit the power cord

Fig 3-A power cord connect above the table-board  


  Fig 3-B  Power cord under table-board

4→Make the water inlet connection pass through the hole in table-board,

If the power cord need to be connect above the table-board, please keep the cable above the table; please refer to Fig4-A;

If the power cord need to be connected under the table-board, please make the cable pass through the hole in table-board. Please refer to Fig4-B;

Fig 4-A power cord connect above the table-board


Fig 4-B  Power cord under table-board

5→Fix another rubber mat to the inlet connection under table-board, make sure the rubber mat completely touch the back surface of the table-board

Fig 5-A power cord connect above the table-board    


Fig 5-B  Power cord under table-board

6→Fix the hold-down nut to further fasten the tap under the table-board

Fig 6-A power cord connect above the table-board  


  Fig 6-B  Power cord under table-board

7→Connect the inlet water pipe, please remember to fix a filter net inside the nut of water pipe, please make sure the water is turned off

Fig 7-A power cord connect above the table-board  


Fig 7-B  Power cord under table-board